


10 Scary Halloween Photography Tips
With the witching hour almost upon us it's time to get your cameras out to capture those ghouls and goblins. Halloween photography can be terrifying, freaky or thought-provoking. It all depends on your model, lighting, props, and editing choices. Read our top 10 scary photography tips and create a whole range of devilishly haunting photographs just in time for Halloween.
1. Shadows and Lighting
When it comes to spooky and scary photography we typically think of dark and shadowy images. However, what makes these photos work so well is having the right balance of dark and light. The contrast between light and dark is what makes the shadows so mysterious and spooky. Depending on where you are photographing you may wish to use the natural light to capture your shots. Alternatively if you have chosen a dark location such as a basement, an attic or are shooting at night, then ensuring that you have the right lighting is essential.
Don’t worry too much if your images are too light when taking the photos as this can be edited in post. If you’re looking to create a really dramatic shot then using flashes, strobes or even some bright spotlights could be a great option. If you have limited equipment you can stick to natural light and look for spaces with directional and focused light.
Think about light that may be coming through a window or through the gaps in the trees and what shadows they might create. Use what you have around you to create your shadows and you’re sure to create a really eerie photo.
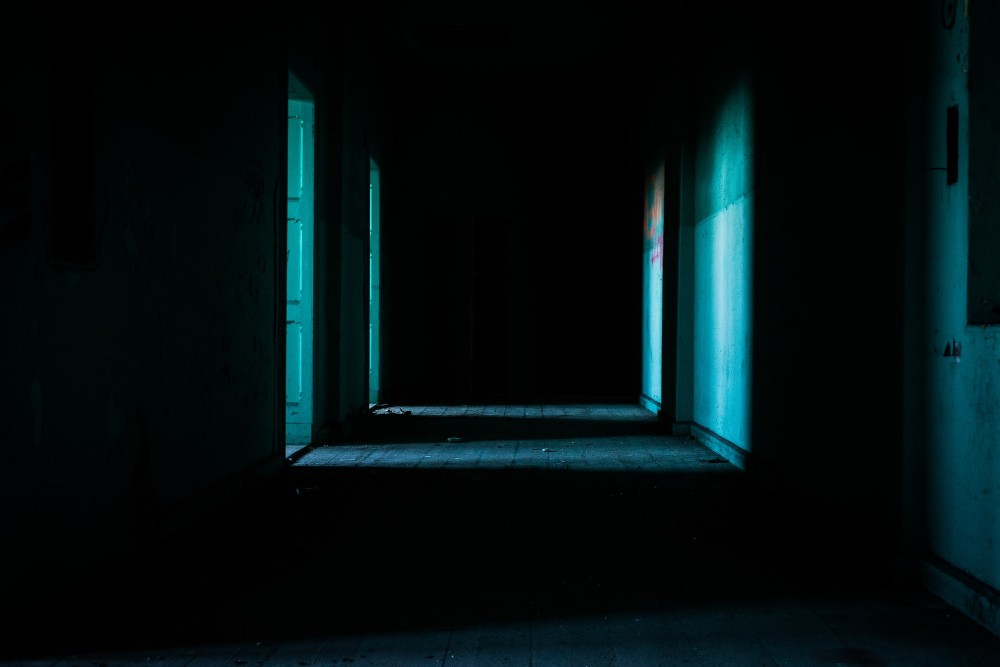
Photo by Kamil Feczko on Unsplash
2. Subject and Location
While any location can be made to look spooky with the right lighting and editing, a sure fire way to guarantee a scary photo is a scary subject or location. While you don’t have to use something that is obviously creepy, you should select something that has an interesting element or a dark vibe. Places like dark alleys, gloomy woods, and abandoned buildings can be good ideas when it comes to locations. The same goes for river banks and foggy mountains at dawn or dusk.
In addition to giving your photos a gloomy edge, the right location will most likely give you multiple options when it comes to backdrops to shoot in front of too. If the subject of your halloween photos is a person or object then the way you photograph them could make a huge difference. For example when it comes to scary photos of people, dark makeup and lighting can make a huge difference. Try a variety of close up and wide shots to find what works best for you and your subject.
3. Props
No halloween photo shoot would be complete without scary props. However, that does not mean you have to go out and purchase expensive costumes. Use your imagination and get creative. There may be items you already have at home or can buy fairly cheaply such as sheets, pumpkins, halloween costume knives, smoke bombs, fake blood or makeup. Go as big or as subtle as you like to create a truly gory and grotesque photo. When it comes to horror the rules are there are no rules.
By experimenting with different props and styles you’re sure to find something that really transforms your photos from nice shots to edgy and cool halloween photos. Whether you go for something simple and effective such as using sheets to create a ghostly figure or go big with lots of prosthetics and spooky props, you’re sure to create something spooktacular.
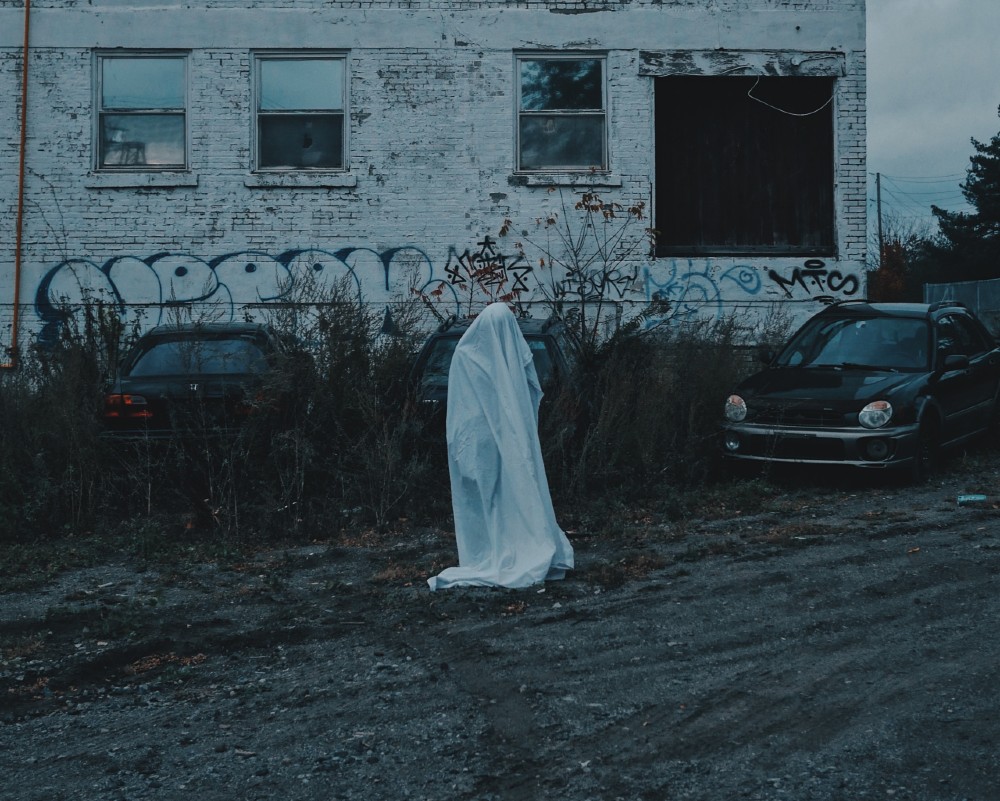
Photo by Patrick Tomasso on Unsplash
4. Texture
One way to add depth to your scary photos is to use texture and layers. Focusing on rough textures such as peeling paints on walls and dusty furniture or windows can add an eerie vibe to your photos. To create a hazy or dusty atmosphere try using a smoke machine or throwing dust in the air just as you’re about to take the photo.
This will create an ethereal haze that is perfect for both landscapes and portraits. From draping fabric to using fallen Autumn leaves, there will no doubt be an abundance of free or natural items you can use to create a textured or layered look.
5. Motion Blur and Long Exposure
Halloween photography isn’t just about using props and locations to create creepy imagery, you can also use your camera to create some really unique shots. For example motion blur, which is the streaking of moving objects caused by rapid movement or long exposure times can add a ghostly effect to your Halloween photos.
Place your camera on a tripod and take photos with a slow shutter speed. The slower it is, the blurrier your image will look. This is a great way to capture different movements and make your Halloween photo look abstract. For a ghoulish finish try panning and zooming to experiment with different types of long exposure or have your subject move in an eerie ghost like way.
6. White Balance
Why not add some eerie effects to your Halloween photography using white balance? White balance is a setting on your camera which is used to control how colours are captured in different types of light. When you correctly set your white balance, you are taking into consideration the colour temperature of the light in your scene.
By presetting the white balance you can make what would be a warm photo much cooler, which can give a creepy halloween feel. This works well in Autumn as the outdoors can often look quite orange or brown and a cooler colour temperature will certainly bring a ghost like finish to your photos.

Photo by Daniel Jensen on Unsplash
7. Angles
Shooting from different angles is a great way to add some horror to your photos. Try getting low to the ground and shooting upwards to make your subject or model seem bigger or more intimidating than they really are. This not only works wonders on people but on trees and buildings too. By making a forest or alleyway seem taller or more stretched than it is, you can give the impression that your surroundings are closing in around you.
The more unusual the angle, the spookier your pictures will look. For example a crooked or tilted view can make the viewer feel very uneasy and unbalanced. While typically we don’t want to make the viewer feel uneasy, a slight tilt to the camera can be really effective in creating a spooky feel. Be careful not to over do it though as you don’t want the viewer to have to tilt their head to see the image. A slight tilt is just enough to give the impression that something doesn’t feel quite right about the photo.
8. Framing
Framing your subject properly can help add visual interest to the foreground of your image and add depth to the overall photo. You can end up with a foreground, the subject and then a background giving you a layered image which is really pleasing to look at. It can also help to tell a story and add atmosphere and context to a photo. For example you could photograph your subject whilst standing slightly behind something that blocks out some of the image to give the impression that you are hiding or are spying on someone.
Alternatively a wide shot that initially focuses on the main subject while something else lurks in the background can give a really sinister feel to the image. Whether you’re shooting a model, still life or landscape, the way you frame the photo could be the small detail that takes it from being a nice shot to a scary photo.
A9. perture
If you choose to do your Halloween photoshoot in a dark setting then you may wish to think about your camera aperture. Aperture is the opening in a camera lens which light travels through to the camera body. The more open a camera lens aperture is, the larger the hole and the more light that gets in. The more closed a camera lens is, the smaller the hole is and less light gets in.
In a dark environment or if you are taking nighttime photography it would be best to use a larger aperture such as F/1.4 as they allow as much light in as possible. This should mean that you won’t have to boost your ISO too high in order to achieve the low light image you want in your Halloween photography. This will help reduce grain or noise in your photos, unless this is the look you’re going for.
10. Editing
The final and possibly most important scary photography tip is to edit your photos. Great editing can transform your spooky photos from amateur to professional. Editing scary photos can be really fun as you are able to utilise much more extreme editing techniques as you don’t have to worry about keeping a natural look. Here are a few things to keep in mind when adding some eeriness to yourshots:
- Monochrome - Black & white images tend to look much more creepy than full colour images. While colour can still play an important role in halloween photography, black and white images certainly have a more sinister edge. Experiment with your images and see what happens.
- Experiment with colours - If you do decide to use colour in your images, feel free to be creative with your approach. Try exaggerating or desaturating the colour or use the wrong white balance on purpose.
- Introducing grain - Grainy images can make the scene look unrefined or very old, so if you’re up for creating something that’s supposed to look ancient, adding grain could be a great way to go.
- Using vignetting - Vignetting can create dark corners around the image to create a closed in and claustrophobic feeling, which can enhance the sense of creepiness.
- Contrast - Contrast in photography is the visual ratio of different tones in an image. This difference is what creates the textures, highlights, shadows, colors and clarity in a photograph.
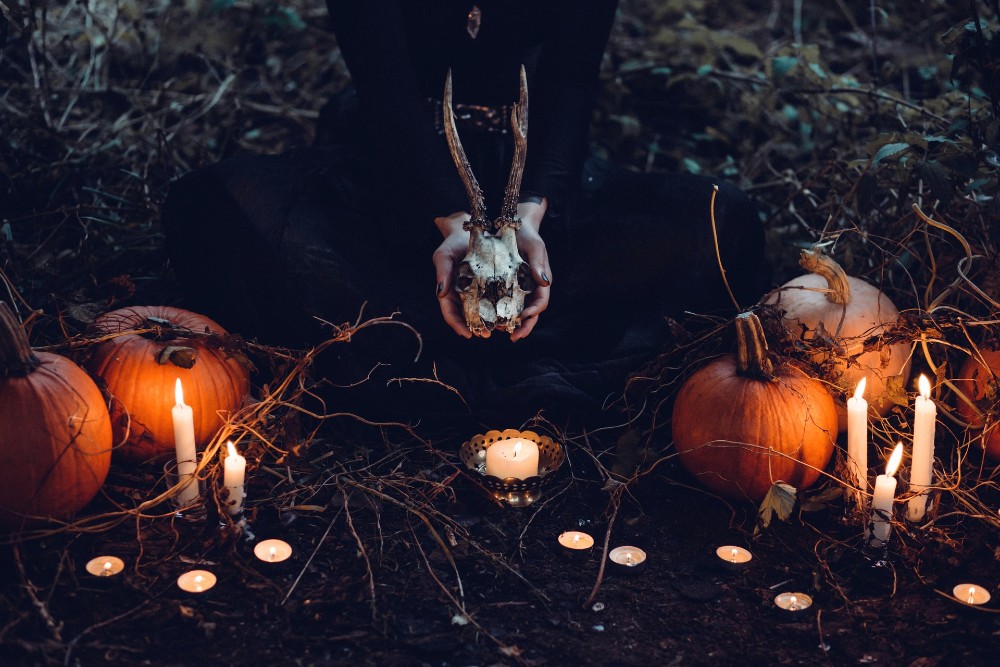
Photo by freestocks on Unsplash
Conclusion
The main thing to remember when taking scary photos is to have fun. The options are truly endless and no matter the outcome, you’re sure to create something truly spectacular. Now that you’ve read our 10 scary halloween photography tips, why not update your camera equipment before you next go out shooting. Explore our range of new cameras, used cameras, lenses, lighting and accessories.